Start a new chat and first line will be your chat title so make it clear, eg Golden Years April 26 Blog Posts, or Golden Years April 26 Client Posts, etc …
Set the mode to: Thinking and enter the following prompt for topic research (with the correct Feature name and links) –
Feature Name Date Year Blog Posts: Please research topics for our upcoming Feature "Home Sweet Home" - you can see past and current blog post links at these links so please suggest new topics or further information if needed on already used topics. Please check what is currently trending in NZ but are also topics we can provide information on without needed to be an expert in a particular field or trade. Links are: https://linku2hibiscuscoast.co.nz/home-sweet-home/ and https://linku2hibiscuscoast.co.nz/hibiscus-coast-feature-archives/
Copy all info into a topic suggestion document in your Feature folder
Do a second search for client focused topics by a second prompt (with the correct client names) –
Please also suggest 1-2 topic subjects I can put forward to each of the following clients bearing in mind if we have used posts from them in the past from above links. These topics can be, but should not all be related to the above post suggestions. This is because I want 3-4 general topics not linked to a client, as well as include 3-4 client linked posts but ensure we have a good rounded variety of topics. The current clients are: (list your clients)
Also copy and paste into your document.
Email each client with a suggestion email
Select general topics for blog (3-4)
General Blog Post Creation
Once a topic is selected from the general options (see below for quick guide table to the below) –
Step 1:
Go to Gemini | Linku2 Features notebook
Set the mode to Pro and copy the following prompt –
[Feature name and opening date] blogs: Write a blog post about [INSERT TOPIC]. Include with some generic focus towards the Hibiscus Coast a keyword list (as a block separated by commas for easy copy and paste - make sure the keywords include long tail keywords and also words used in both the meta title and description), meta title, meta description and a short summary for my Gem prompt. Please also suggest 1-2 external site pages/articles which can expand on the topic links and incorporate these within the post content and add in the links and also link to 1-2 internal Linku2 Hibiscus Coast good links, eg possibly business categories or client pages that may be able to help with the topic. Please ensure all spelling follows the UK English as in the attached source document UK English v US English.
Insert the blog topic title into the prompt then generate.
Then check and if all looks OK, copy and paste all generated content into a separate document specifically for that blog post only. Otherwise, regenerate if changes are needed.
Step 2:
Go to your Gem “Post/ Page Social and Classified Caption Writer” ensure the mode is in Fast and paste in the following prompt and add your blog short summary and post title
Here is the blog info. Please generate the captions only: [Paste Title and Summary]
Copy and add your title then don't hit ENTER - just add a dash then copy your short summary and add - then ENTER
Once the captions are generated copy and put in your post master document
Then Add to Notebook: Use the three dots (...) (find the GEM in the chat history and click on the 3 dots) to save everything into one project folder (particularly important for these captions as generated in your Gem) (save to either your Feature notebook or your social media posts notebook) - You may wish to change the name to ensure you know the Feature it matches
Step 3:
Go back to your Features notebook
First click Tools and toggle on "Create Image", then type in the full following prompt below, add your blog post title, (make sure you put the full prompt below into the chat (up to end of style line) –
Generate a 16:9 aspect ratio image for the blog post: [Paste Title]
CRITICAL Rules for this image:
The image must feature the blog title in a bold, readable text overlay.
The title must be LARGE and CENTERED so it is the main focus.
Once you have your image save to your Feature folder as a jpg and name "title fbog1" (you will take out the "1" when you resize for the website)
If the image is created but the title is still too small, do not restart. Keep the create image tool on and use this specific override command in the same chat:
Tip: If the text is messy, click the three dots (...) on the image and select
Redo with Pro for better typography
Then generate other image sizes as follows –
Step 4:
Once you have a 16:9 image you like, still make sure the create image tool is on and simply type:
Now instantly resize this for a 1:1 Instagram square.
Then save to your folder as a jpg and "title ig1"
Step 5:
For the 1200x300 banner enter the prompt –
Use the ‘blank blog post banner template ' from my sources to create the 1200x300 banner for this post using the same image as the previous images. Please remove all wording for a blank image only.
Save to your folder as a jpg and "title banner1"
Then before doing anything else go to the folder on your computer and resize the 3 images for web. To do this -
Highlight the banner and Instagram images
Right click and select "Resize with Image Resizer"
Select option "Website for all Feature Images" and resize
Then resize the fbog image using the custom fbog size
Then just rename all 3 by taking out the "1" and bracket comments so an SEO friendly title
Then delete the original 3 images just so you don't get confused when uploading
Remember when entering in your post the SEO content fields are top right under the little rocket looking sign)
Note: You only need to create two visuals for all four social platforms (plus your banner image).
See below* for a copy of the "Master Workflow" including All Platforms
Website Upload
If the post is for a client remember to add their full contact details at the bottom of the post (you can copy and paste from their directory listing) and their advert somewhere in the content.
Once you have all your content and images –
Go to posts
New post
Fill in all details, content, keywords, meta details, social details, select the template for the correct Feature (under Render Page Using Template).
In SEO fields add keywords under Content Analysis
Add schema - Article (WebPage) | Blog Posting | Title | Description use summary | Linku2 | Add fbog image | SAVE
Then in the right column under post add the banner image
Select categories
Add the Feature tag
PUBLISH
Check all internal and external links are correct
Check your SEO fields have all been filled as some slip out if you forget to save individually
Save again
Classified advert
If you are adding a classified –
First go back to Gemini, set to Pro and add the following prompt attaching your copy of the client post and adding in the client name -
Please write a new and different meta title and description for a related classified advert to run alongside the attached post for [client name] making the meta description into a CTA and rewrite the classified wording as an introductory text for the post that introduces the problem the blog post solves, then links to the article for the full answer. Make sure the classified content is no longer than 3 punchy sentences to prompt a click on the blog post. Also include a short punchy title for the classified - keep in mind it will appear on this list of ads so needs to stand out - https://linku2hibiscuscoast.co.nz/classifieds-2/ - here is the link to the post - [add link to client post] - Make sure the meta data stays within the limits of 60 characters for the title and 160 characters for the description but utilises the allowable space to give good attractive meta data for SEO and as a CTA.
Open their post document and add all the above (you also need to get the keywords from this)
Once you have this -
Go to classifieds
Add post
Add title and content that was generated for you by Gemini
Tick Latest Feature category in the right column (and any other categories you want this to appear in)
Add your SEO and keywords (use the same keywords as the article)
Add your generated image (use your Facebook 16:9 image)
Change Author to anonymous (otherwise the Linku2 logo appears so if it is a generic post you may want to leave as Linku2)
Add contact information
Preview the advert and check everything is OK
Check publishing dates you want and change accordingly
Publish
Then add in your Board weekly task for the publishing date to be able to schedule a social if you wish or wish to report to a client, etc
Scheduling
Once all is uploaded for SEO first go and internally link any that could be appropriate or to any client pages.
Then –
Wait until all posts are uploaded (or add a title at least if you are waiting on content so the post is included in your schedule) and you will run a schedule prompt.
Before doing this make sure all classified ads still live from the last Feature are taken out of the "Current Feature" category. You can do this by -
Going to Classifieds | Published
Quick Edit for any not in the new Feature
Update their categories | Update
Then go to Gemini, set as Pro and add the prompt as follows filling in the Feature details and links -
Prompt Title: 4-Week Feature Social Media Scheduler (with Link Extraction)
Role: Act as a Social Media Planner for Linku2 Hibiscus Coast.
Task: Create a balanced 4-week content schedule for the upcoming [INSERT FEATURE NAME] which runs from [START DATE] to [END DATE].
Source Links:
Main Feature Page: [INSERT LINK TO BLOG POST LISTING PAGE]
Classified Category: [INSERT LINK TO SPECIFIC CLASSIFIED CATEGORY]
Instructions: 1. Extract Content: From the links above, identify the individual blog post titles and the specific classified ads. 2. Platforms: Schedule across Facebook (Hibiscus Coast Community), Facebook (Linku2 Hibiscus Coast - Business), Instagram, LinkedIn, and Google Business. 3. Frequency: Space posts evenly (approx. 3–4 posts per week total). 4. Variety: Alternate between blog posts and the "Featured Locals" classifieds.
Output Format: Provide a table with these columns:
Date
Time
Platform
Type (Blog Post or Classified Ad)
Content Name (The specific title of the post/ad)
Direct Link (The actual URL for that specific item)
Reach/Impressions (Stats 1)
Clicks/Engagement (Stats 2)
Platform Specific Notes (Stats 3)
Constraint: Do not provide wording or captions
(end of prompt)
Then copy and paste the schedule into an excel document which you will save to your Feature folder. Then do the following prompt with Gemini in Pro mode, to get a list of info to report to the clients -
Client Schedule Extractor
Prompt Title: Client Promo Schedule Extractor for Emails
Role: Act as a Client Communications Assistant for Linku2 Hibiscus Coast.
Task: Review the attached 4-Week Feature Social Media Schedule Excel document and extract a clean, personalized summary of promotional dates for each individual client to be pasted directly into an email.
Instructions:
Analyze the Document: Look at the "Content Name", "Date", "Platform", and "Type" columns in the attached Excel file.
Group by Client: Identify the distinct businesses or clients based on the "Content Name" column.
Extract Dates & Platforms: For each client, exRole: Act as a Client Communications Assistant for Linku2 Hibiscus Coast.
Task: Review the attached 4-Week Feature Social Media Schedule Excel document and extract a clean, personalized summary of promotional dates for each individual client to be pasted directly into an email.
Instructions:
Analyze the Document: Look at the "Content Name", "Date", "Platform", and "Type" columns in the attached Excel file.
Group by Client: Identify the distinct businesses or clients based on the "Content Name" column. If the content mentions a specific client name, use that as the header. If it is a general post without a specific client, group it under the header "Generic" (you may include a short topic note for clarity).
Extract Dates & Platforms: For each client or generic topic, extract the specific dates and platforms where their "Blog Post" or "Classified Ad" will be featured.
Format for Email: Output a simple, easy-to-read bulleted list for each client/topic. Do not include internal links, stats, or times—just the date, platform, and content type.
Output Format Example: [Client Name OR Generic - Topic]
[Date]: Featured on [Platform] ([Type, e.g., Blog Post])
[Date]: Featured on [Platform] ([Type, e.g., Classified Ad])tract the specific dates and platforms where their "Blog Post" or "Classified Ad" will be featured.
Once you have the information copy and paste into a document so you can quickly re-copy into your client email.
Before reporting to clients -
Schedule any social posts (or add to your Board week tasks to schedule) to do this -
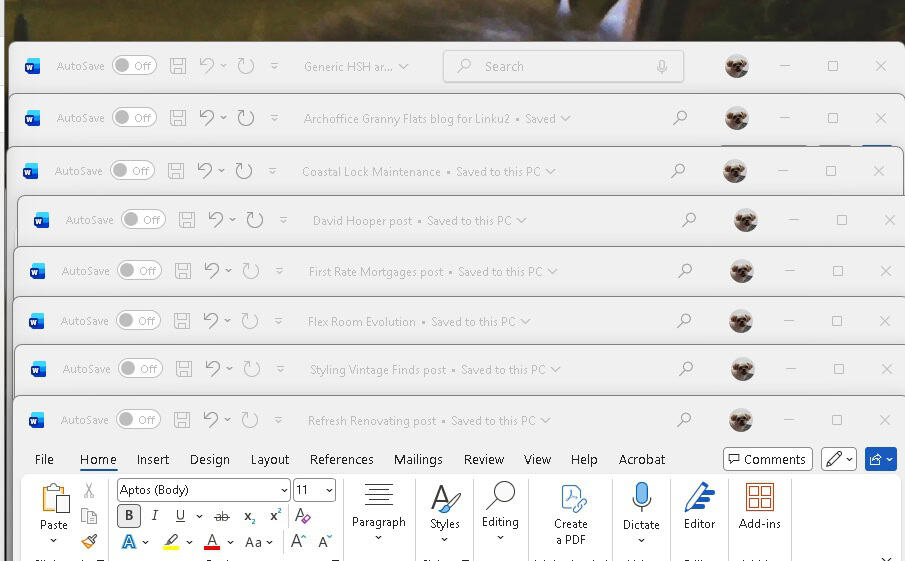
Open each client document in the Feature folder (if you have two screens you can "stack" these over half the page just so you can see the title and be able to click on it to get your content - see image below*) this is for the wording and use this alongside the schedule document - alternatively you can open all documents and use the word tab in your toolbar to open each one as you need.
Open the schedule document and add it on the other half of the page next to the document links and make columns so you can see all you need
On your other screen you will open your social channels and schedule the posts
Once you have scheduled a post from a word document just minimise it in case you need it again (close all documents at the end)
Add links in the next newsletter
Add all links in the sharing schedule
Client Reporting
Then go to your Fluent CRM contacts for each client/business you are going to report to and use the template "FEATURES - Reporting to clients at start of Feature with links" and add in their schedule.
End of the Feature Promotion
At the end of the promotion period add all stats from posting and sharing into the schedule so you can easily report to clients in their next report.
*MASTER WORKFLOW
To make it clear which step covers which platform, here is the updated step-by-step process.
Step
Where
Task
Step 1
Notebook
Write the Blog: Generate the post, keywords, and meta data and short summary of the topic (Setting: Pro).
Step 2
Gem
Get Captions: Paste the summary into your "Text-Only" Gem to get all captions for FB, IG, LinkedIn, GMB, and Classifieds (Setting: Fast).
Step 3
Notebook
FB & LinkedIn Image: Ask the Notebook to "Generate a 16:9 image with the [Title] centered and bold." This one image works for both platforms.
Step 4
Notebook
IG & GMB Image: Ask the Notebook to "Instantly resize that for a 1:1 square." This square works for both Instagram and Google Business.
Step 5
Notebook
Banner: Use your established prompt: "Use the 'Blog Banner Canvas' from my sources to create the 1200x300 banner".
*Document stacking
Want locals to find your business?
We offer FREE business listings as well as affordable and effective SMART Plans to reach your targeted local audience. Check these out ...